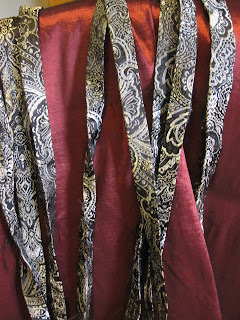
Trims can be expensive. Consider making your own. They are fun to make, and instead of having that made in China look, they will be unique. The possibilities are endless, but here are several simple ideas to get your creative juices flowing.
-Cut a straight piece of fabric on the grain that is twice the width you desire plus 1/2". Fold and press it in half the long way, then stitch the raw edges together. Press the raw edge under just past your stitching line, @ 1/2" from the raw edge. Pin and sew in place. I used this technique on the tunics pictured here. I got a yard of brocade on sale for $5 and did all of them with fabric to spare.
-Hand gather a piece of ribbon or fabric in a zig zag pattern, being careful to loop the thread over the edge.
The next and final step is to pull the gathering thread, adjusting it evenly. All you have to do now is sew it in place.
You can also coil it into a zinnia-like flower.
-Another way to manipulate fabric for trim is to gather ribbon or fabric you have made into bias tape along both edges evenly, then sew in place.You can also coil it into a zinnia-like flower.
-If you have an embroidery machine, your choices are endless. You can embroider any long, straight design on the fabric or ribbon of your choice, like I did for the trim on this bodice. I embroidered several rows of this design on satin charmeuse, pieced them together, and pressed under the raw edges. I sewed it on with silver thread that matched the Celtic knot design.


.JPG)
.JPG)
.JPG)

No comments:
Post a Comment